Sewing Machine Cover

I don’t blog about craft projects all that often, if you have this post in your feed and didn’t want it, then try my “tech” feed specifically rather than all of the blog posts (recommended as I will be blogging a few non-tech things in the coming months). Anyway, I love to make things, code or otherwise, and since I’m not travelling a lot at the moment, I have time to make things AND to write about them. Today: my new sewing machine cover!

New Sewing Machine Cover

Continue reading

Fabric Bags

This weekend I decided it would be good to spend some time away from the computer, but the weather wasn’t really good enough to get out and do much, so I needed a “rainy day” project. I remembered that I’d signed up for a free introductory Craftsy class a few weeks ago, so I logged in to take a look at what was involved. Continue reading

Big Bed Cushions

This week I finally got around to making the big cushions for our bed. We do have some but they were cheap and are now old – and I reallocated Kevin’s onto my office chair about a year ago. Since we do often read or use the laptops in bed, cushions would be a good thing to have, but I just didn’t have the time to make them! Work was less crazy in February and I found I had the mental space to think of these things, so I bought two big fluffy cushions, and dug out the fabric I had left from making the curtains so that the cushions would match, and here they are:

New Bed Cushions

The cushions were 66cm so I cut two rectangles that were (66cm plus seam allowance) wide and ((2.5 * 66cm) plus seam allowance) long. Then I hemmed across the short sides (this was really fraying fabric, I should have overstitched everything before I started but I was too impatient!). They are simple envelope-backed cushions so I lay them on the floor with the right side up, folded the long sides at 33cm and then 99cm, basically you have a short end folded up and then the long end folded over that, with the seams showing. Then you sew up the sides and when you turn it the right way out – the short bit of the envelope is on the outside.

Dead simple but they match the curtains and they are lovely and soft – the fabric is plain sheeting too so nice and comfortable even in bed!

Charlie Bag from Burdastyle

About a year ago I discovered the BurdaStyle site – where they have open source patterns. And then over the summer I saw an event organised in NYC where they were making these Charlie Bags – foldable fabric bags for putting shopping in. The pattern is free, and came as a PDF. You print the PDF, and then you cut and stick to make the paper pattern – the bag is bigger than A4.

Once I’d made the pattern, I cut out the bag and followed the instructions. They have good instructions, step by step with pictures. The Charlie bag is really simple so you just zig-zag round the shape and leave the handles like that, just unfinished, which is about the only way someone with my sewing abilities is going to make anything with curvy handles :)

I’m really pleased with the result:

Charlie Bag

This was pretty simple and now I’ve assembled the paper pattern, I might make a few more :)

New Bedroom Curtains

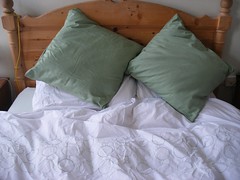
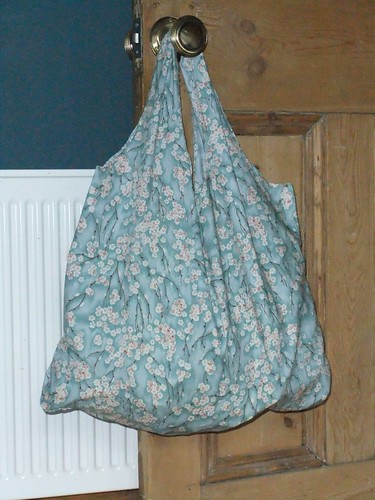
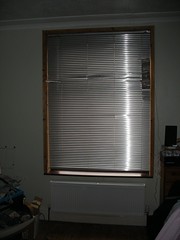
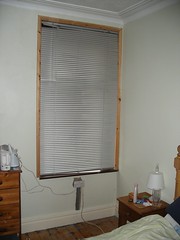
This weekend I took some time to make some curtains for the bedroom. Since we bought the house we’ve had some rather unattractive and slightly broken metal blinds. The room was otherwise OK though and we just kind of moved into it and worked on the rest of the house. I bought the fabric for the curtains soon after we moved in but I needed some help from my mum to actually make them as I wanted to do 2 layers and wasn’t sure how to proceed.

Window 1, before Window 2, before

Kevin’s mum Kath was visiting this week and while explaining to her why I couldn’t do this task myself, we kind of talked me round. Curtains are just straight lines after all so I dug out some crafty books and considered the task (thanks Kath!)

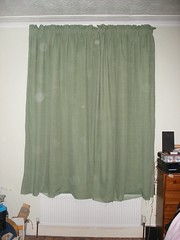
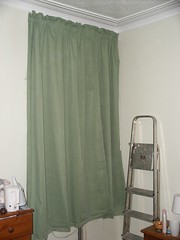
I had two layers of fabric, one plain sheeting and one floaty gauze – the idea of having floaty curtains but which do actually block the window. I measured the window and found that both were 74 inches high and were 56 and 44 inches across respectively. I do mean inches, our ceilings are 8 and a half feet high so most of our windows are taller than me! This of course makes curtains quite an undertaking, with 60 inch wide fabric and two curtains on the bigger window and one on the other, I had two 60 inch by 80 inch curtains and one 90 inch by 80 inch. By the time you have seamed edges and top, and attached curtain tape, that’s more than 30 yards of sewing and you need a LOT of floor to cut things out on. The wrestling was quite worth it though:

Finished Curtain 1 Finished Curtain 2

For reference, the curtains were quite easy to make (although they’re still unhemmed). The recipe goes something like:

  • cut fabric, lay out with right sides together
  • for the wider curtain, I joined half a width with a full width to get the size I needed
  • pin and then stitch down outer edges
  • pin and then stitch along the top
  • turn right side out (like a duvet cover!)
  • pin and then stitch corded curtain tape 5cm from top of curtain, along back
  • hang curtains
  • admire
  • Wonder how long til I get around to hemming them? My excuse is that curtains are supposed to hang for a while, to allow them to “drop” to their eventual length!