My ffmpeg Cookbook

I have been doing more screencasting lately, so I thought I’d share some recipes here, for my own future use and in case anyone else wants to use them. I capture my videos using Kazam on Ubuntu, usually by resizing my second monitor to 800×600 and then capturing that. Kinda eye-bleeding to record but looks good in playback and also works well either in tiny web view or on a big screen. I also screencapture my android device and for that I use Screen Recorder.

Continue reading

Ubuntu and the X220T Touch Screen

I have a thinkpad laptop with a touchscreen and a swivel so it can fold up and pretend to be an oversized tablet. I like it a lot, but the touch screen interface hasn’t been all that useful since I normally use this machine docked and then it maps the whole of one screen as a touch interface across my multiple monitors as a desktop space!

I recently sorted this out, so I thought I’d share the scripts that worked for me on Saucy Salamander Ubuntu 13.10 with Unity.

First, work out which device you actually want:


$ xsetwacom --list
Wacom Bamboo stylus id: 11 type: STYLUS
Wacom ISDv4 E6 Pen stylus id: 13 type: STYLUS
Wacom ISDv4 E6 Finger touch id: 14 type: TOUCH
Wacom Bamboo eraser id: 19 type: ERASER
Wacom Bamboo cursor id: 20 type: CURSOR
Wacom Bamboo pad id: 21 type: PAD
Wacom ISDv4 E6 Pen eraser id: 22 type: ERASER

Then, use xsetwacom to get the right touch input relating to the correct screen, even with multiple monitors:


$ xsetwacom set "Wacom ISDv4 E6 Finger touch" MapToOutput LVDS1

At this point I should point out that my touch screen is incorrectly configured and therefore needs the script above running every time I plug or unplug an external display. Since I dock my machine, move it almost daily, and regularly present … that’s kinda irritating. Any solutions on improving that are welcome.

Simple Video Editing on Ubuntu

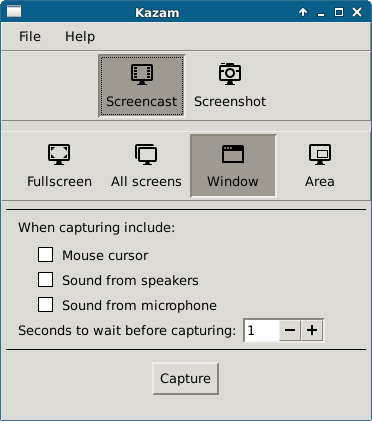
In this series of posts about my screencasting toolchain, I’ve already written about using wmctrl to resize windows accurately and about using Kazam to capture snippets of video from various applications. This post describes my adventures in trying to glue the video snippets together.

Graphical Video Editing

For most people, it probably makes sense to use a graphical video editor, such as KDEnlive, OpenShot or Pitivi. I tried the latter two and found them sufficiently crashy that I was unable to get a video out of them that I could play back. This might be a result of my total lack of knowledge of, and respect for, containers, codecs, and … really whatever else I needed to know and didn’t. I presume the crashiness was me doing something wrong as I know that others do use these tools successfully.

I’m also a commandline sort of person. I have difficulty in using a pointing device for any length of time, and I found that I was able to capture the videos tightly enough that I just needed to glue them together rather than actually edit.

Ffmpeg

Ffmpeg is a commandline linux tool that is the biggest swiss army knife of video tools you have ever seen. There’s just one problem: on ubuntu, the program called ffmpeg is actually an alias for avconv, which is a fork of ffmpeg that is missing some key elements, such as the ability to concatenate videos. The upshot of which is that I downloaded and compiled my own copy of ffmpeg for this project. Once I had that, things got easier :)

I used this guide to get my ffmpeg tool and all the dependencies set up: https://trac.ffmpeg.org/wiki/UbuntuCompilationGuide

Ffprobe

Ffprobe is a tool that looks at a video file and gives information about it. One thing that I found about combining videos is that matching resolutions and encodings are really important – sometimes you can create what looks like a valid output file, only to have it unable to play in some players. To use it:

ffprobe video.mp4

I found this very useful, so I thought I’d add a note about it here. I tested my videos in VLC, it seems a bit less tolerant than the standard gnome player, so it was a good way to check if the videos would play. There’s also a simpler version of VLC that shows fewer controls: cvlc (I found it handy).

Combining Videos with Ffmpeg

Once I had the genuine version of ffmpeg compiled, I used that to combine my videos. First of all, I created an input file which contained a list of videos. Here’s an example of my

input.txt

file:

file 'wireshark1.mp4'
file 'wireshark2.mp4'
file 'wireshark3.mp4'
file 'wireshark4.mp4'
file 'wireshark5.mp4'
file 'wireshark6.mp4'
file 'wireshark7.mp4'

(can you guess what this was a video of?)

Then I used the following command to use this input file and create a resulting video of these videos played one after another:

./ffmpeg -f concat -i input.txt -c copy wireshark-demo.mp4

This can look successful and still produce a bit of a strange video if all your video files aren’t precisely the same resolution and format, but I was able to get results pretty quickly once I knew I had to get those things right in recording. The time spent planning the videos paid back several times over, as it was easy to just recapture one piece of the sequence if the need arose.

Ffmpeg is a beast, powerful but superbly complex, and it was tough going to find the commands I needed even without the “wrong” fork of the project being the default with ubuntu! Hopefully this post will remind me next time what to do, and if it helps you too, then awesome :) Feel free to leave additional tips and tricks in the comments.

Screencasting in Ubuntu: Kazam

If you’ve ever seen a live demo, you will know that these things are fraught with danger. Even if the wifi works, the presenter knows what they are doing, and nothing crashes, you’ll often end up watching someone explaining something to their laptop in detail, or clearly demonstrating their inability to type. Either way, it doesn’t make good, informative content, which is why I never ever demo in a conference talk – I’m there to entertain and time is always of the essence. At this point, you can probably guess why I’m writing a blog post about my screencasting toolchain – I simply pre-record whatever it is that I want to show in the talk.

On an ubuntu platform, I’ve had a few false starts with video over the years, and mostly avoided it. But now my “Debugging HTTP” talk really does make more sense if you can see the process of something broken, what the tools show, and how to understand that information and fix the problem.

Kazam

kazam-close Continue reading

Accurate Ubuntu Window Sizing with Wmctrl

I’m working on a bunch of screencasts at the moment (more posts to come) and one of the things that tripped me up the most was getting all the windows the same size, so that the resulting videos are the same size and can easily be put back together. Enter wmctrl, a very nice linux tool that can do all of this for me.

I’m aiming to have a series of windows all sized at 800×600, and the first step is to look at a list of windows in wmctrl:

wmctrl -lG

wmctrl-lg

The -l switch provides a list, and the -G switch shows the geometry of the windows. This is especially useful if you want to place something on a second monitor, you can look where a correctly-placed window would go and then use those co-ordinates! Also beware that windows positioned at the origin of a desktop space rarely end up where you expect them to go.

To set a new geometry for a window, we use the -e switch to specify what that should be. The format is:

"gravity, X, Y, width, height"

For gravity, try zero. X and Y are the co-ordinates of the top left hand corner of the window, and width and height hopefully you can guess. It’s also acceptable to pass -1 for any of these values for the window to retain its current setting.

To specify a window, we use the -r switch to indicate to wmctrl which window wants the resize. You can give the title of the window, or the identifier shown in the list output, but I found it most useful to use the special value ":SELECT:" and then just click on the window I wanted to affect. Therefore the command I used the most became:

wmctrl -r ":SELECT:" -e "0, -1, -1, 800, 600"

As a final tip, make sure (by resizing the window to something definitely smaller than the desktop it is on) that the window is not maximised – if it is, it will stay that way and you will wonder what you are doing wrong.

PHP 5.4 Timezone Error Message on Ubuntu

Quick post because this tripped me up the other day: When you use a vanilla ubuntu 12.10 “Quantal Quetzal” installation, it will come with PHP 5.4, which is excellent news. However the default php.ini doesn’t set the timezone, so you will see an error like:

It is not safe to rely on the system’s timezone settings. You are *required* to use the date.timezone setting or the date_default_timezone_set() function. In case you used any of those methods and you are still getting this warning, you most likely misspelled the timezone identifier.

These have been warnings in earlier versions of PHP, but as of PHP 5.4, the date.timezone ini setting must be set correctly, using the continent and place – for me that’s “Europe/London”, like this:

date.timezone = "Europe/London"

If you see these errors, don’t panic, just add the line above to your php.ini.

Ubuntu Icons Directory Routing

I had the weirdest problem the other day so I thought I’d write it down! I uploaded a toy script for someone, but it had images in it and they wouldn’t load. The image files existed, and I could request everything around them, files in other subdirectories were okay; the same files in other subdirectories also served correctly. Yet in my error logs I just had lots of:

File does not exist: /usr/share/apache2/icons/ ...

Which was really odd, because my webroot is somewhere else completely!

Eventually I spotted a /icons entry in the configuration for mod_alias in apache, which intercepts all requests to /icons on any virtual host, and rewrites it. Err, thanks? Renaming the directory to “images” solved the problem in this instance, and I hope if you googled for an error message, you will find this page and be able to fix it equally quickly :)

Managing PHP 5.4 Extensions on Ubuntu

My shiny new VPS* runs Ubuntu 12.10 (official subtitle: Quantal Queztal. Local nickname: Quirky Kestrel) and therefore has PHP 5.4 installed. It’s very new so every command I type is missing, and today I realised that included a PECL module (pecl_http, of course). So I aptitude install php5-pear and then get tangled in dev packages (clue: look which libcurl you have already installed to figure out which of a long list of -dev packages to choose), managing finally to emerge with a pecl install http that completes successfully with the words:

configuration option "php_ini" is not set to php.ini location
You should add "extension=http.so" to php.ini

I’ve been using Ubuntu for some time however, and we don’t put settings straight into php.ini, there’s a directory called /etc/php5/conf.d/ where all the various module configurations live, or you can enable things just for when PHP is called by apache or from the CLI. However today I hopped into /etc/php5/ and saw this:

.
├── apache2
├── cli
├── conf.d
└── mods-available

Hmmm … mods-available ? Continue reading

Downloading Files from Faspex

This week, someone sent me a very large file using something called faspex. To begin with, it sent me a link to click on to download my file, but then started telling me “for best results, install a plugin”. And apparently “for best results” means “to download this file in any way”.
Continue reading

Movable Type Fonts and Ubuntu

Since relaunching this site, with actual design rather than several shades of pink thrown together, I’ve become more aware of being consistent in presentation. With this in mind, I wanted add the same fonts to Ubuntu that are used here.
Continue reading