I looked around for some export functionality for github but I got a lot of posts complaining it wasn’t there. Since I hate applications that take your data and refuse to let you remove it, I was disappointed by this news but further inspection showed that although there might be no “export from github” button, there’s an API that more than has it covered. The API returns JSON which is easy to work with from many programming languages, and is perhaps even more powerful and flexible than the simple export I initially expected, so here are some examples.
Tag Archives: github
Migrating Github Contributors to an Organization
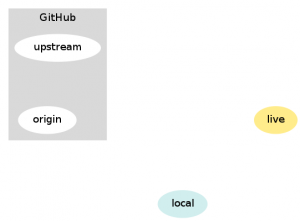
In fact, all I had to do was update my upstream remote on my local repo – I set this up following the excellent github forking instructions when I first forked the repo. All I did then was to check my remotes:
git remote
This showed my remotes with the “upstream” pointing to the old repo. So I copied the URL of the organization repo, removed the old version and added a new upstream:
git remote rm upstream
git remote add upstream git://github.com/joindin/joind.in.git
Everything now behaves as before while handling the new central repo for the project – hopefully this helps others with projects moving from user accounts to organizations (or organisations, as I keep typing, British spellings as always!)
Working with Branches in Git
Available Branches and The Current Branch
This is the easy bit:
$ git branch
* api
master
$
The entry with the star next to it is the current branch, so here you can see that I have branches “master” and “api” and I’m currently working on the “api” branch. If you only have one branch it will usually be called “master”.
Creating and Changing Branches
My experience is with Subversion until now, and branching is really different in git (because it actually has branches rather than just copies, this is definitely a feature, but it is a different approach from how I had used them before). So you can switch your working copy around to look at different branches, which threw me a bit to begin with. To change branches, just checkout the one you want:
$ git checkout master
Switched to branch 'master'
$
If you actually wanted a new branch simply name it and ask checkout to create it if it doesn’t exist, by using the -b switch:
$ git checkout -b demo
Switched to a new branch 'demo'
$
So now my branch command shows me this:
$ git branch
api
* demo
master
$
Pushing Branches
This is very much an optional step. Many of my branches are private branches – meaning that I branch on the development server, finish the feature at hand, and then merge the changes into my master branch without pushing the branch to anywhere else. To share changes with others though, I sometimes like to push my changes up to github – which is my “origin” remote on my repo. So to push the demo branch we just made, I would simply do:
$git push origin demo
Total 0 (delta 0), reused 0 (delta 0)
To [email protected]:lornajane/joind.in.git
* [new branch] demo -> demo
$
If you use “git push” on its own, it will push all branches which exist on both the local repo and the origin – but will not push any private branches unless you specify that it should.
Resources
The http://help.github.com site, Github’s own documentation, is actually brilliant and has really helped me to get up to speed with working with my own code and contributions from others.
* The only problem I’ve had with code on github recently is that I merged totally the wrong changeset into the main project root. Which really isn’t the fault of the source control system :)
An iPhone App for Joind.in
My boyfriend Kevin was thinking of developing an iphone app, mostly to find out more about the technology, and I suggested he take a look at the API for joind.in and consider building something on that. The joind.in project belongs to enygma, a.k.a. Chris Cornutt from phpdeveloper.org and he has the code available on github – so we grabbed it. The API wasn’t previously used by much so we were able to tidy it up a bit and then consume it from the iphone to suit our needs. Chris has accepted my alterations to his existing project with grace – even when I’ve totally broken the live site with them!!
The joind.in site is a classic MVC setup and the API already existed within the application. It is implemented with a separate set of controllers for the various actions supported by the API, which all inherit from a controller which handles the output formats etc for the XML and JSON responses. It isn’t the world’s best API but its perfectly sufficient for the task at hand – I intend to write some examples for using it but until then you can read this post from Derick about how he used the joind.in API to pull in comments on his talks onto his own site.
The app itself has the core functionality of joind.in that an attendee would want in his pocket at an event. The events and their details are there, along with the talks at each event. Attendees can leave comments on the various talks and socials, and these can be browsed in the app as well. To give you a little taste of the app, here are some screenshots:
If you have an iphone or ipod touch and you’re attending an event any time soon, then download the app – its under “utilities” in the app store. Comments, suggestions, bug reports and feature requests are all gratefully received (no promises about fixing/implementing them but we’ll do our best!). Our app went from submission to approved in 3 days which is very fast – thanks apple!
Contributing to Projects on GitHub
Register on Github
To do anything useful I first needed to sign up for an account. Github has a range of accounts but I found that with one of their free accounts I would be able to get started and contribute to the project. This gives me a project space of my own and a user to tie all my activities to.
Set up SSH Key
In order to authenticate against the github servers, you need to set up an ssh key and give them your public key so they know you are you. You’ll then need to tell git to use this key whenever it makes contact with the github servers. I do quite a bit with ssh and ssh keys myself so I was comfortable with this step. Even if you are totally new, its still pretty straightforward and they have a great howto on github itself which will help.
I had issues with git not picking up that it needed to use a non-standard ssh key, but I found the answers in this entry on the git website. In a nutshell, set up an ssh alias, set the key in there and then use the alias instead of the actual URL when giving the repo location to git. This now works like a charm for me.
Fork the Project
Now, github uses “fork” where I might choose to say “checkout” – fork in my world means something else completely. But in this case you’re just making your own copy of the project repository. This is where you will commit your changes to and it retains its link with the original repository making it easy for anyone with commit access to that to pull in your changes. Patch files are nowhere to be seen, and although I was wary at first, this is project collaboration at its most painless, I’m impressed! Forking was relatively simple and again there was great documentation on the github site. In particular I recommend that you take the time to follow the bit about adding an alias for the “upstream” repository – this made committing my changes to the main joind.in repo really easy.
The forking instructions linked above also gave a description of how to actually use git, how to get my changes applied to my local repo, and how to push them to my remote repo on github itself.
Make a Pull Request
Once I’d fixed a few things, I was ready to push the code back to the main project so that Chris could consider it for inclusion. This is done by making a pull request from the main project page – you can add a comment about the changes you are supplying to help the maintainers to manage all the incoming patches.
Go Forth and Contribute
It was easier than I expected to get set up to contribute to a project using github, so find something you want to improve and/or be involved with, and do it. I began by fixing the docs for joind.in, which was a great place to start since it allowed me to make a useful contribution without touching the code in the first instance :)